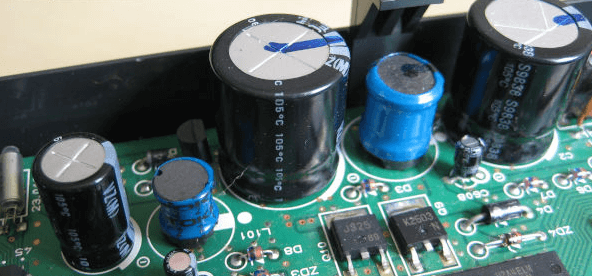
Capacitors have become integral components in high-end car audio systems, bridging the gap between power demand and supply, especially during peak performances. But how does one ensure that these capacitors are always ready to do their job? If you’re wondering “how to charge capacitor car audio systems efficiently,” then you’re in the right place. This detailed guide will help you comprehend the charging process and why it’s crucial for your car audio’s optimal performance.

The Role of Capacitors in Car Audio Systems:
Car audio enthusiasts will attest to the vital role that capacitors play. Serving as temporary storage units for electrical energy, capacitors ensure that amplifiers receive the sudden bursts of power they need, especially during high bass outputs. This function protects the battery and alternator from undue stress and prevents annoying dimming car lights during high-volume sound outputs.
However, to ensure capacitors serve this role effectively, they need proper charging before integration into the system.
How to Charge Capacitor Car Audio the Proper Way:
The Need for Proper Charging:
When directly connected to a power source, a capacitor can draw instantaneous high currents, leading to dangerous sparks or even damaging your car’s electrical system. Charging it correctly and safely is, therefore, of paramount importance.
Materials You Will Need:
- Your capacitor
- A resistor (typically about 1-2 ohms, 10 watts)
- A voltmeter
- Connecting wires
- The car battery
The Step-by-Step Charging Guide:
Safety Measures: Always ensure the vehicle’s engine is turned off. Disconnect the negative terminal of the battery to create a safer working environment.
Resistor Connection: Attach one end of the resistor to the connecting wire. This resistor will serve as a current limiter, ensuring a gradual and safe charge for the capacitor.
Voltmeter Setup: Connect the voltmeter’s positive lead to the capacitor’s positive terminal and the negative lead to the negative terminal.
Charging Initiation: Connect the free end of the wire (the one with the resistor) to the positive terminal of the car battery. Keep an eye on the voltmeter. The voltage reading should start rising gradually.
Full Charge Indication: When the voltmeter’s reading approaches 12 volts (or the voltage of your car battery), the capacitor is considered fully charged. Disconnect the wire from the battery before removing the voltmeter.
Reintegration of the Battery: Safely reconnect the negative terminal of the car battery.
Incorporating the Capacitor into Your Audio System:
After the charging process, you can seamlessly integrate the capacitor into your audio setup. Make sure it’s connected to the amplifier’s positive terminal and grounded adequately to the car’s chassis.
Tips to Remember:
Frequent Monitoring: Periodically keep an eye on the voltage level of your capacitor. A notable drop in voltage might be an indicator of potential issues.
Invest in Quality: As with any component, quality can significantly impact performance. Always opt for capacitors from reputable manufacturers.
Prioritize Safety: Charging a capacitor might seem simple, but always prioritize safety. Wearing protective gloves and eyewear can shield you from accidental sparks.
Deepening Your Understanding:
Beyond the basics of “how to charge capacitor car audio systems,” it’s beneficial to delve deeper into the science behind it. Let’s explore some advanced considerations and frequently asked questions.
Why Do Capacitors Need to Be Charged Slowly?
Capacitors can be likened to storage tanks, storing energy and releasing it when required. When a capacitor is connected directly to a power source, it behaves like an empty tank with a wide-open valve, attempting to fill up instantaneously. This rapid surge can cause excessive current draw, leading to potential sparks or even damage to the capacitor and surrounding electronics. Slow charging, facilitated by the resistor, allows the capacitor to fill gradually and safely.
Selecting the Right Resistor for Charging:
While we mentioned using a 1-2 ohm, 10-watt resistor, it’s worth noting that these values might vary based on the capacitor’s specifications. It’s essential to check the capacitor’s datasheet or consult with the manufacturer to ensure the safest and most efficient charging process.
Life Expectancy and Maintenance of Car Audio Capacitors:
Like any electronic component, capacitors have a lifespan. However, with proper care and usage, capacitors can serve your car audio system efficiently for several years. Ensure your capacitor is not exposed to extreme temperatures, which can reduce its efficiency and lifespan. Also, routinely check for any signs of bulging, leakage, or physical damage.
What If My Capacitor Doesn’t Hold Charge?
If you notice that your capacitor discharges quickly or doesn’t hold a charge as it should, it could be indicative of several issues:
- The capacitor is aging or is of poor quality.
- There’s a short in your audio system.
- The capacitor’s voltage rating might be lower than your system’s requirements.
In such scenarios, it’s advisable to consult with a car audio specialist or consider replacing the capacitor.
Additional Benefits of Car Audio Capacitors:
Apart from supplying power during high demand, capacitors can also:
- Improve the overall clarity and quality of sound by stabilizing the power supply.
- Prolong the life of the car’s battery and alternator by mitigating the stress from power surges.
Navigating the world of car audio can be as exhilarating as the thumping bass or the clear notes of a soulful song. The intricate details, like understanding “how to charge capacitor car audio systems,” make the journey even more rewarding. As you fine-tune and elevate your car’s audio experience, remember that knowledge is your most valuable tool. Happy listening!
