If you’re a true music lover, you understand the importance of a great audio experience, even when you’re on the road. Whether you’re cruising down the highway, stuck in traffic, or simply enjoying a scenic drive, having a high-quality car audio system can make all the difference. The good news is that achieving exceptional sound in your vehicle doesn’t have to be a distant dream or an expensive endeavor. With a little knowledge, some patience, and the right components, you can embark on a DIY car audio setup journey that will leave you with a smile every time you turn up the volume.
In this comprehensive guide to DIY car audio setup, we’ll walk you through the steps, considerations, and tips to help you create a top-notch audio system that suits your preferences and budget. So, buckle up and get ready to unleash your inner audiophile.
Planning Your DIY Car Audio Setup
Define Your Audio Goals
Before diving into the world of DIY car audio, it’s essential to define your audio goals. What kind of listening experience are you aiming for? Are you a bass enthusiast who loves feeling the low-end frequencies, or do you prioritize crystal-clear vocals and instrument separation? Understanding your preferences will guide your component choices and installation approach.
Set a Realistic Budget
Car audio setups can vary widely in cost, from budget-friendly to high-end audiophile systems. Determine your budget early in the planning process. A well-planned budget will help you select components that balance performance and affordability, ensuring you don’t overspend.
Gather the Necessary Tools and Equipment
A DIY car audio setup will require various tools and equipment, including:
- Screwdrivers and wrenches
- Wire strippers and crimping tools
- Electrical tape and heat shrink tubing
- Multimeter for testing electrical connections
- Panel removal tools
- Cable ties and mounting hardware
- A wiring diagram for your vehicle
- A workspace with good lighting
Having the right tools at your disposal will make the installation process smoother and more efficient.
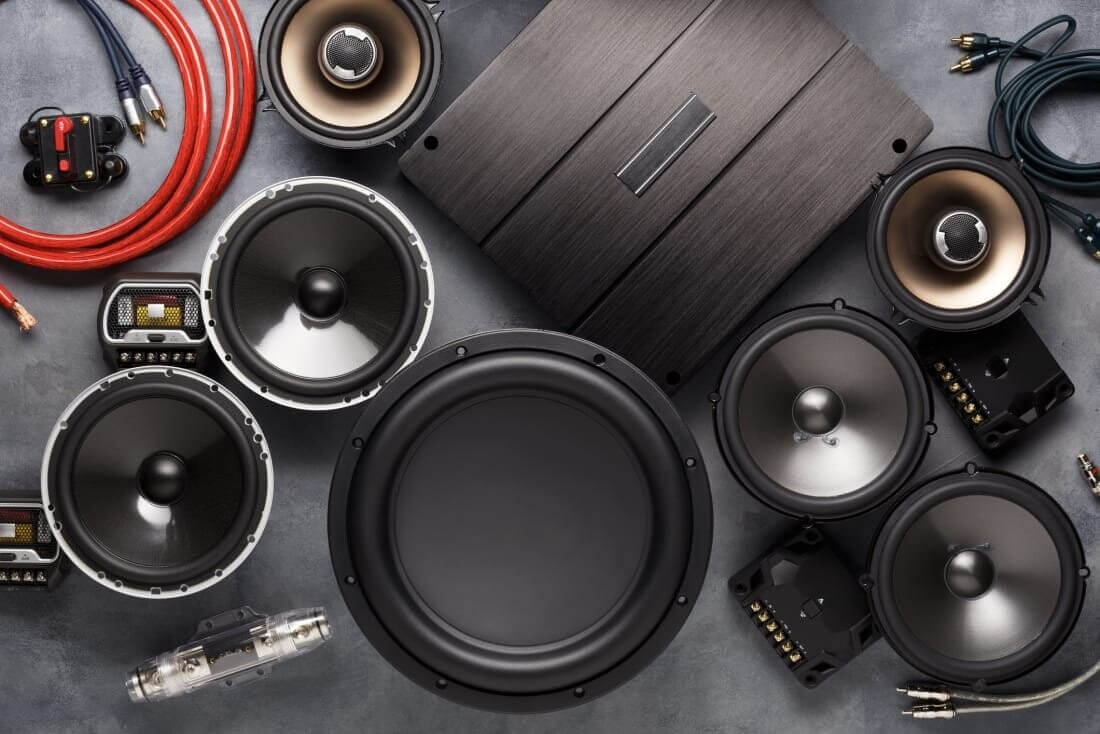
Choosing the Right Components
Head Unit (Receiver)
The head unit is the control center of your car audio system. When choosing a head unit, consider the following:
- Compatibility with your vehicle’s make and model.
- Audio sources you’ll use (CDs, DVDs, USB, Bluetooth, etc.).
- Expandability options, such as preamp outputs for future upgrades.
- Smartphone integration for apps like Apple CarPlay or Android Auto.
Speakers
Selecting the right speakers is crucial for sound quality. You’ll need to decide between coaxial (full-range) speakers and component speakers:
- Coaxial speakers are an all-in-one solution that combines tweeters and woofers in a single unit. They are easier to install and suitable for most budgets.
- Component speakers separate tweeters, woofers, and crossovers, allowing for more precise sound customization and better audio quality. They are ideal for audiophiles.
Consider the size and location of the speakers in your vehicle, as well as their power handling capabilities.
Amplifiers
Amplifiers increase the power sent to your speakers, resulting in louder and clearer sound. When choosing an amplifier:
- Match the amplifier’s power output to the speaker’s power handling capabilities.
- Consider the number of channels (e.g., 2-channel, 4-channel) based on your speaker setup.
- Factor in the amplifier’s size and installation requirements.
Subwoofers
Subwoofers are responsible for delivering deep, impactful bass. Consider the following when selecting subwoofers:
- Choose subwoofers that match the enclosure type (sealed, ported) and size (e.g., 10-inch, 12-inch) appropriate for your vehicle.
- Pay attention to the subwoofer’s sensitivity and power handling to ensure it pairs well with your amplifier.
Wiring and Connectivity
Ensure you have the necessary wiring and connectivity components, including:
- High-quality speaker wires, power cables, and RCA cables.
- Properly rated fuses and fuse holders to protect your system from electrical issues.
- Distribution blocks, if needed, for power and ground connections.
- Connectors, terminals, and adapters for secure connections.
Installation and Setup
Create a Wiring Diagram
Before you start the installation, create a detailed wiring diagram that outlines the connections for your entire audio system. This diagram will serve as your roadmap during installation, minimizing errors and confusion.
Disconnect the Battery
Safety should always be a priority. Disconnect the vehicle’s battery to prevent electrical accidents while working on the audio system.
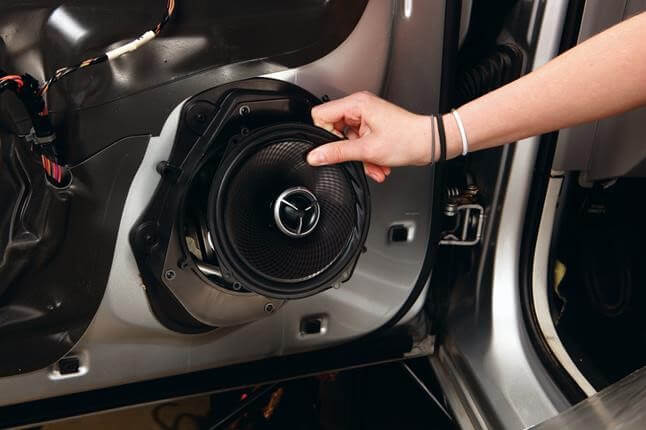
Remove Interior Panels
To access your vehicle’s factory speakers and wiring, you may need to remove interior panels. Use panel removal tools to avoid damaging the trim or upholstery.
Install the Head Unit
Follow the manufacturer’s instructions to install the head unit. Ensure all wiring connections, including power, ground, and speakers, are secure.
Install Speakers and Subwoofers
Carefully mount and secure the speakers and subwoofers in their designated locations. Proper installation ensures optimal sound quality and prevents vibrations.
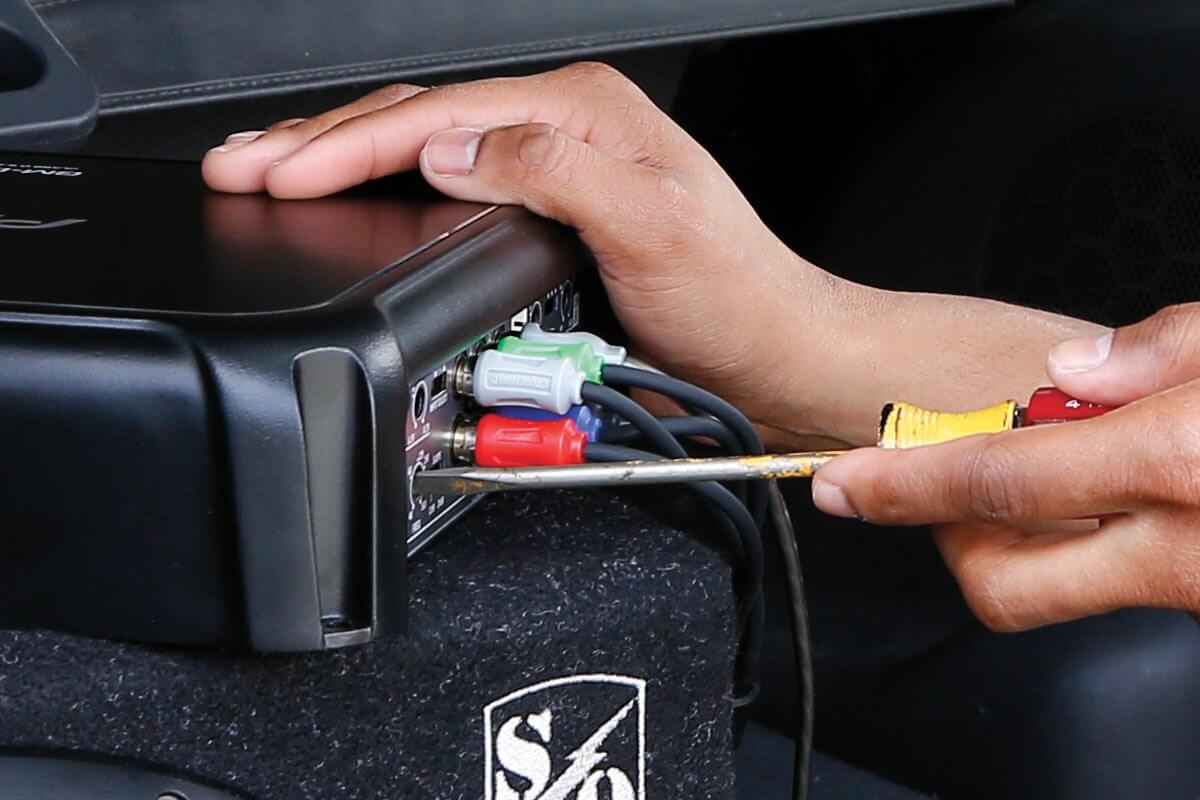
Wiring and Connection
Connect the wiring, ensuring proper polarity and secure connections. Use soldering or crimp connectors for a reliable electrical connection. Route and secure wires to avoid interference or damage.
Install the Amplifier
Mount the amplifier in a suitable location, ensuring proper ventilation and secure mounting. Connect the amplifier to the head unit, speakers, and power source according to the wiring diagram.
Tune and Test
After completing the installation, it’s time to tune and test your audio system:
- Use a multimeter to check voltage levels and ensure there are no electrical issues.
- Adjust amplifier gain settings to match your speakers and subwoofers.
- Fine-tune the equalizer and crossover settings on the head unit for optimal sound quality.
- Test your audio system with various music genres to ensure balanced sound.
Troubleshooting
If you encounter any issues during installation or tuning, refer to your wiring diagram and consult online resources or car audio forums for troubleshooting guidance.
Tips for DIY Car Audio Success
Take Your Time
Rushing through the installation can lead to mistakes and frustration. Take your time to plan, install, and tune your car audio system properly.
Consult Resources
Use online resources, forums, and tutorials to gather information and guidance for your specific vehicle and audio components.
Consider Sound Damping
Applying sound-damping materials to your vehicle’s interior can reduce vibrations and road noise, improving sound quality.
Seek Professional Help
If you’re uncomfortable with any aspect of the installation, consider consulting a professional car audio installer. They can ensure a seamless setup and address any challenges.
Enjoy the Music
With your DIY car audio setup complete, it’s time to hit the road and enjoy your favorite tunes like never before. Whether you’re a bass enthusiast, a vocal purist, or an all-around music lover, your carefully crafted audio system will provide a superior listening experience. So, turn up the volume, embrace the music, and let your inner audiophile revel in the world of DIY car audio.
In this comprehensive guide, we’ve covered the essential steps and considerations for planning, selecting components, installing, and tuning your DIY car audio setup. With the right tools, knowledge, and dedication, you can transform your daily commute or road trips into immersive listening experiences that rival any concert hall or home audio system. So, start your DIY car audio journey today and let the music be your constant companion on the open road.